.png)
Configure Continuing Education Categories

Mar 20, 2023
 1842
1842
Continuing Education categories allow you to divide your programs/certifications into "buckets" of share characteristics.
- Click Setup in the left-hand navigation panel.
- Click Category Lists in the Categories section.
- Click the Add button.

- Setting up your category lists is a two step process. First you will add your list, then you will at the actual categories to that list.

- Select Certifications for the Category Type.
- Enter a Name for the category list.
- Enter an optional Description of the list.
- Enable Can Be Used Publicly? if you wish to display the category list publicly.
- Is Active is enabled by default.
- Click Done.
Next you will add the category items to your list. Click the hyper-link for the category list you just created.
- The Category Items window will be displayed.


- Click Add to add an individual category OR click Add Multiple to add a list of items (shown below).
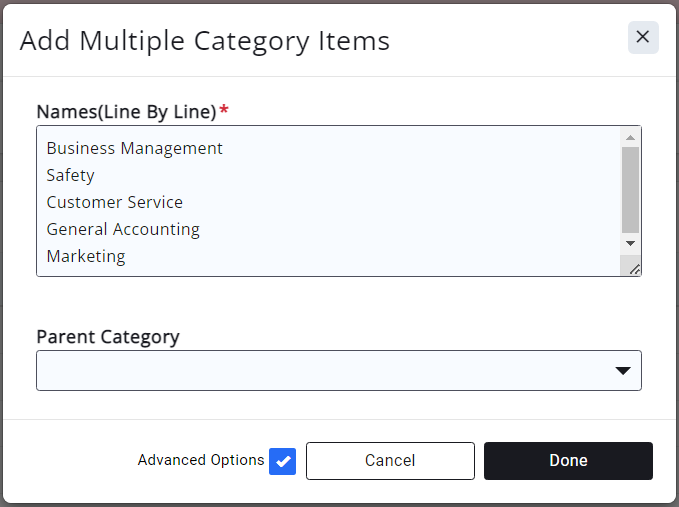
- Enter the names of your category items (one per line). If you have selected to add an individual item, you will only enter one item.
- Click Done. Your category or categories will now display in the category list.

Newly added categories in a category list

