.png)

 5538
5538
Each contact (organization or individual) will have it's own record in the database. There are two easy ways to find contacts:
Global Search
In the Contact's Module
Global Search
|
|
NOTE: Due to the "elastic" logic behind the Global Search, results may not match exactly to your search terms. Using the module search is generally recommended. |

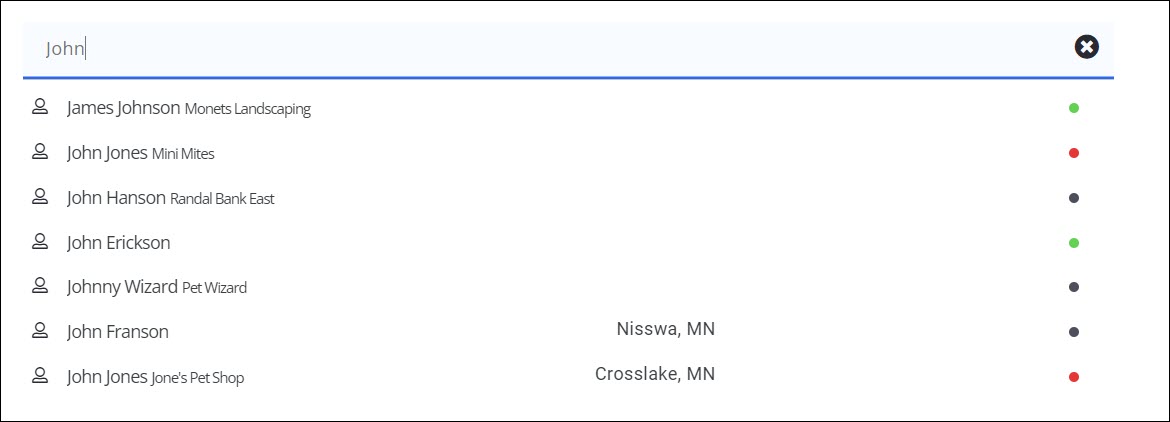
You can search for any contact in the system by using the global search bar at the top of the window. Matching records- individuals, events, businesses, even files- will appear in the selection box as you type.

In the Global Search you can use the following search filters:
- Name of Contact/Project/Event (starts with or contains)
- Contact Email Address
- Contact Phone Number
- NRDS ID/Account Number
- MLS ID (Realtor Edition Only)
- License Number
- Membership Number
By each search result you will see a dot at the far right indicating their status.
- Green = Active or Courtesy (this contact has an active or courtesy membership)
- Black = Non Member (this contact has never had a membership)
- Red = Dropped (this member has a dropped membership)
Search/View within Contacts module
Alternately, you can search for contacts within the Contacts module, where you have a variety of ways by which you can filter your contacts. See View Contacts for additional information. Click Contacts in the left-hand navigation panel.
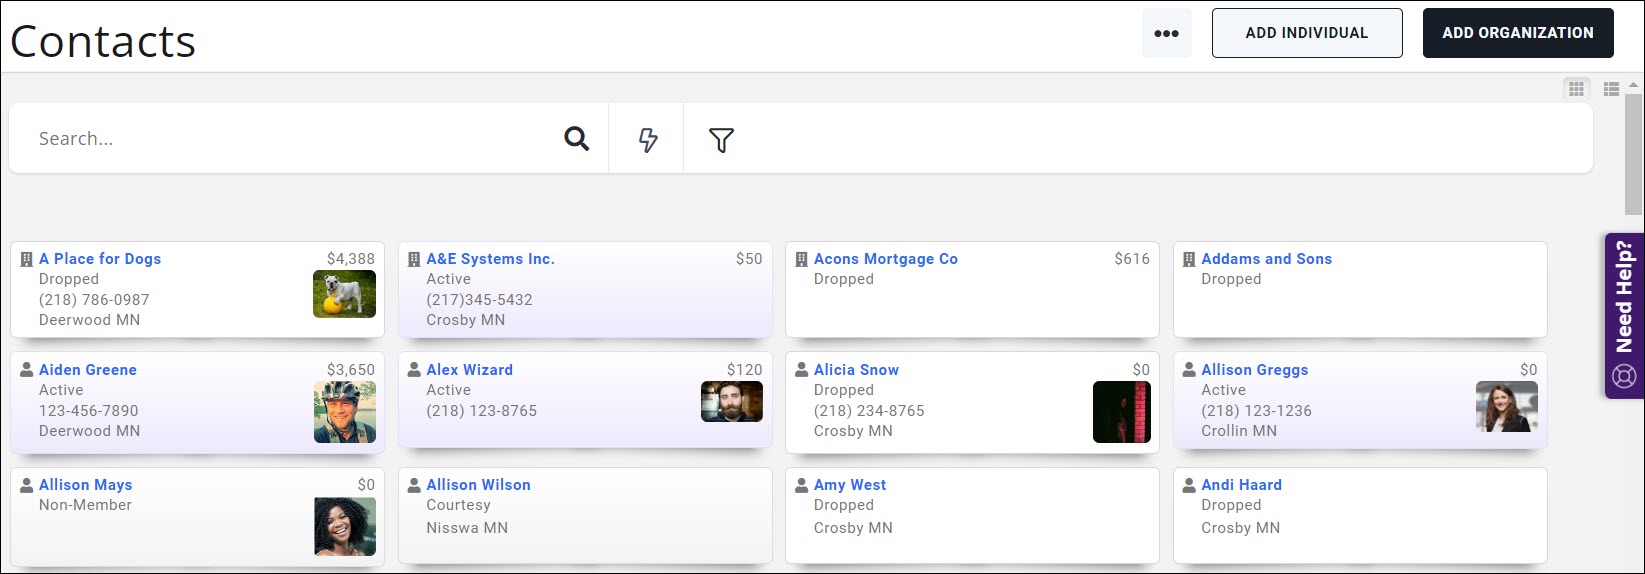
All contacts in your database are displayed by default. You can view contacts in a card format by clicking the ![]() icon, or in a list view by clicking the
icon, or in a list view by clicking the ![]() icon. By starting to type the name of a contact in the Search box, type ahead functionality will filter the list of contacts as you type. NOTE: Accented letters, for example: á vs. a, are considered two different characters and their use would return different results.
icon. By starting to type the name of a contact in the Search box, type ahead functionality will filter the list of contacts as you type. NOTE: Accented letters, for example: á vs. a, are considered two different characters and their use would return different results.
Additional filtering options are available in the Show Only drop-down list. These options are described in the table below. NOTE: If you have changed system terminology, the filter options displayed will be the terminology you have selected.
| Show Only Option | Description |
|---|---|
| Businesses | Select this option to filter the list to only business type contacts. |
| Individuals | Select this option to filter the list to only individual type contacts. |
| Staff | Select this option to filter the list to only your staff members. |
| Owe Money | Select this option to filter the list to only those members who have open invoices. |
| Assigned to Me | If you assign members to specific staff members, this option will allow the staff member logged in to view only the members to which he/she is assigned. |
| Active | Select this option to filter the list to only active members |
| Task Due/Overdue | If using the projects/tasks module, select this option to display only members for which your staff has due or overdue tasks |
| Task Due/Overdue Assigned to me | This option will allow the staff member logged in to view only the members to which he/she is assigned for whom he/she has task that are due or overdue. |
| Event Attendees Potential Contacts | Select this option to view individual who have attended your events. This is a way to identify potential prospective members; or associate individuals to appropriate organizations. |
You may also filter the results by clicking the ![]() icon, and selecting additional options.
icon, and selecting additional options.
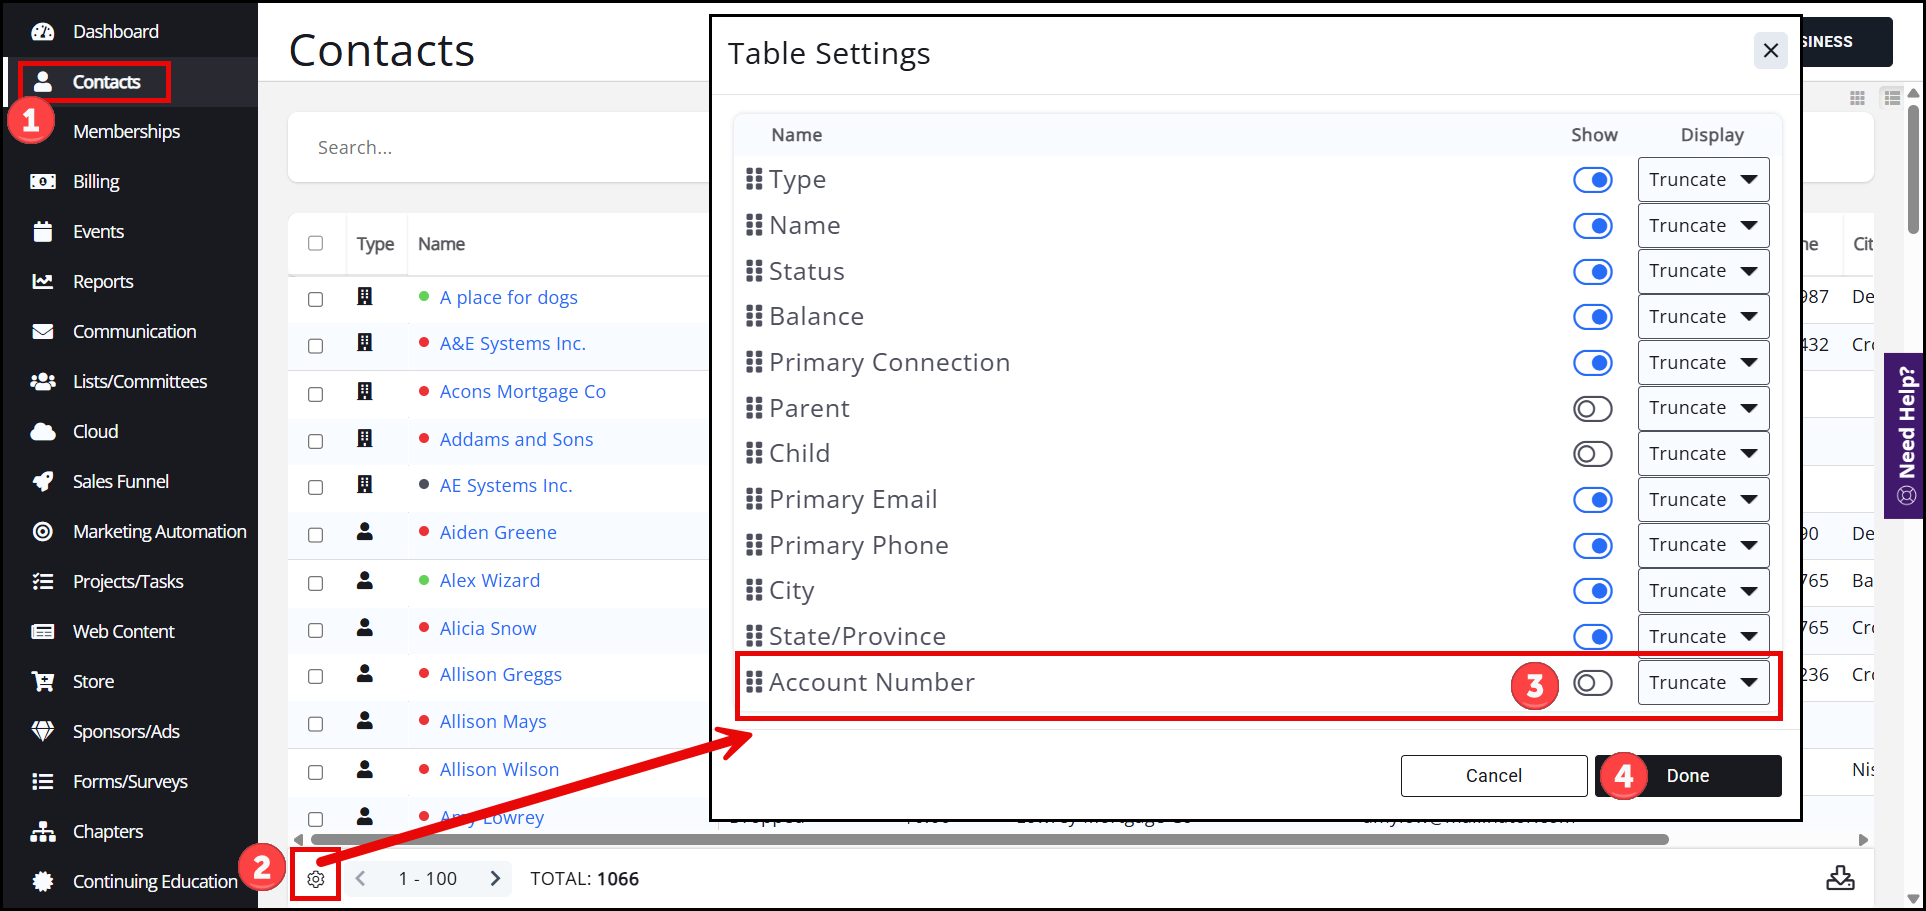
Account Number Column
In the Contacts module list, you can display a column with the Account Number to make it easier to distinguish between similar contact names if you typically refer to contacts by their Account Number.
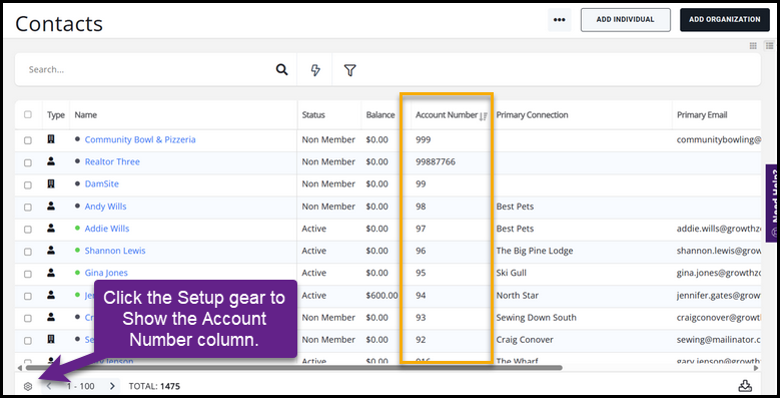
How to set up the Account Number column
- Go to the Contacts module.
- Select the setup gear icon in the bottom left corner of the page.
- Enable the Account Number column.
![]() Note: The column title will use custom terminology for the Account Number if entered. To find this option, go to Setup, then System Terminology.
Note: The column title will use custom terminology for the Account Number if entered. To find this option, go to Setup, then System Terminology.
![]() Tip: Once set up, you can search for the Account Number in the search box at the top of the Contacts module.
Tip: Once set up, you can search for the Account Number in the search box at the top of the Contacts module.

