 4783
4783
NOTE: Email Designer emails and templates are only deliverable from the Email Designer tab and are not available to select anywhere else in GrowthZone. You can however use them for/in Marketing Automation workflows.
When working with an Email Designer newsletter, you will want to preview the formatting and layout to ensure the message is clear and readable regardless of how the recipient receives the message- on their desktop, on their phone, or any mobile device in between- and you can email that preview to another staff member for review. You can also choose to send your newsletter immediately, or schedule it for later delivery.
*NOTE: This video was recorded with the previous interface. We will be updating videos as quickly as possible.
Previewing
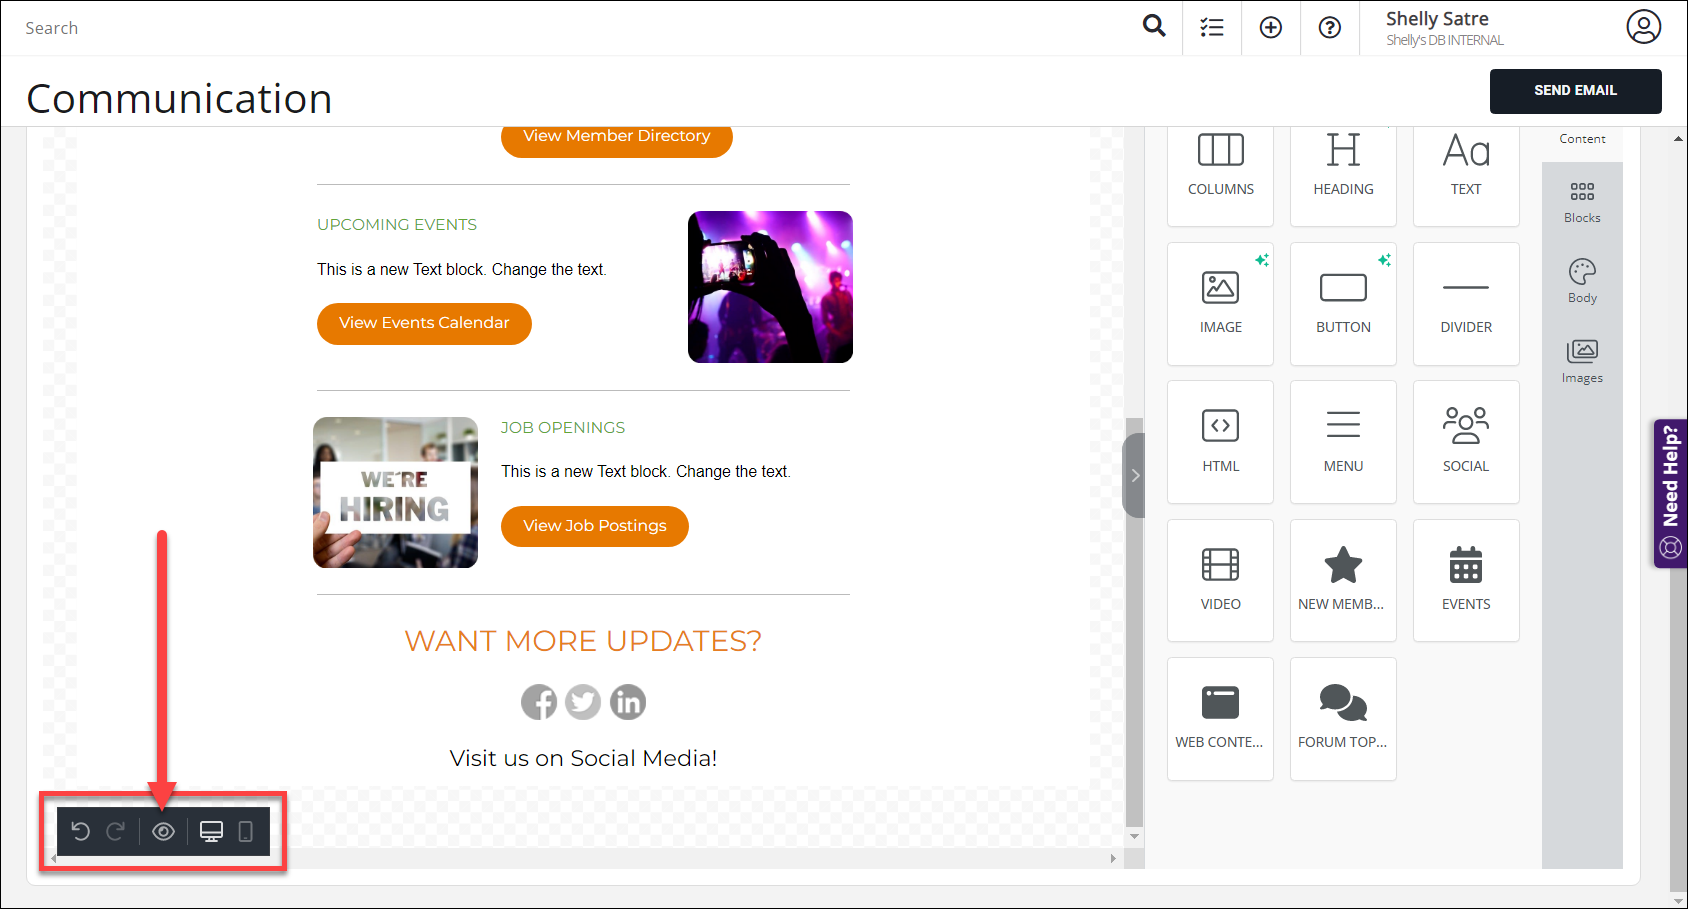
In Email Designer, you have several preview options to select from, and all are located at the left hand corner at the bottom of the Email Designer workspace.

View a Preview of Your Email Designer Newsletter
Prior to sending out your Newsletter, you will likely want to preview. Preview icons are available at the bottom of the screen.
- Click the
 icon to view a desktop preview (someone using a laptop or computer)
 - Click the
 icon to view a mobile preview (tablets, phones, etc)
 - Click the
 icon to open the preview in a browser-like frame

Previewing a newsletter in a desktop format.
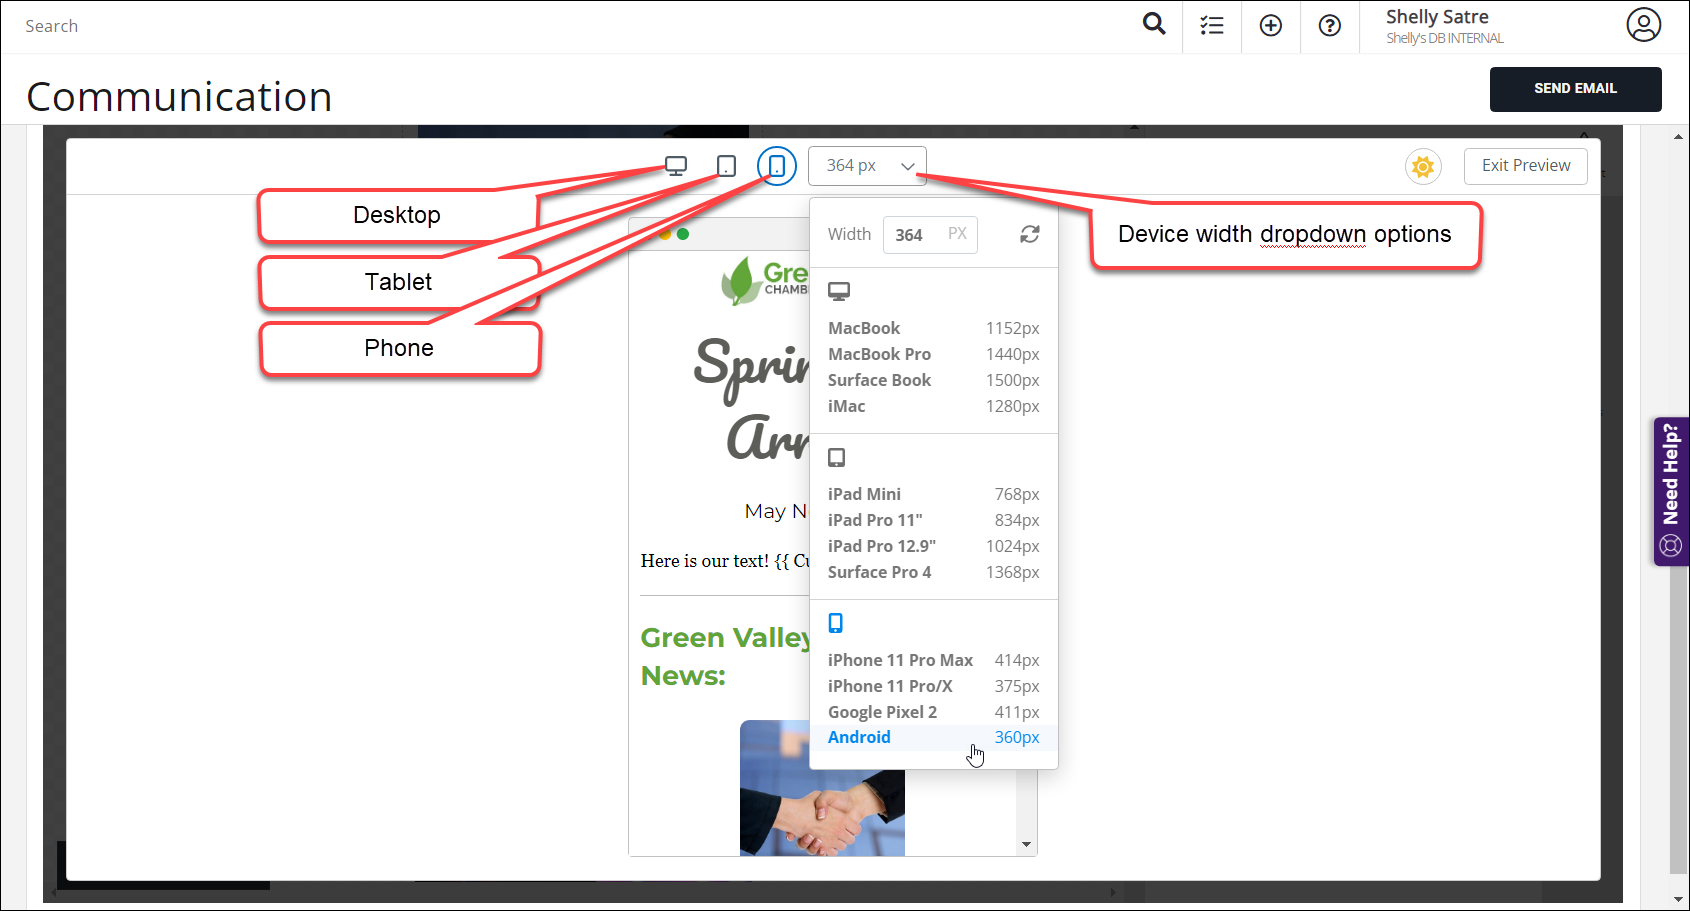
The preview "browser frame" allows you to swap between desktop, tablet, and phone views, with preconfigured, selectable width options based on the device and/or operation system.

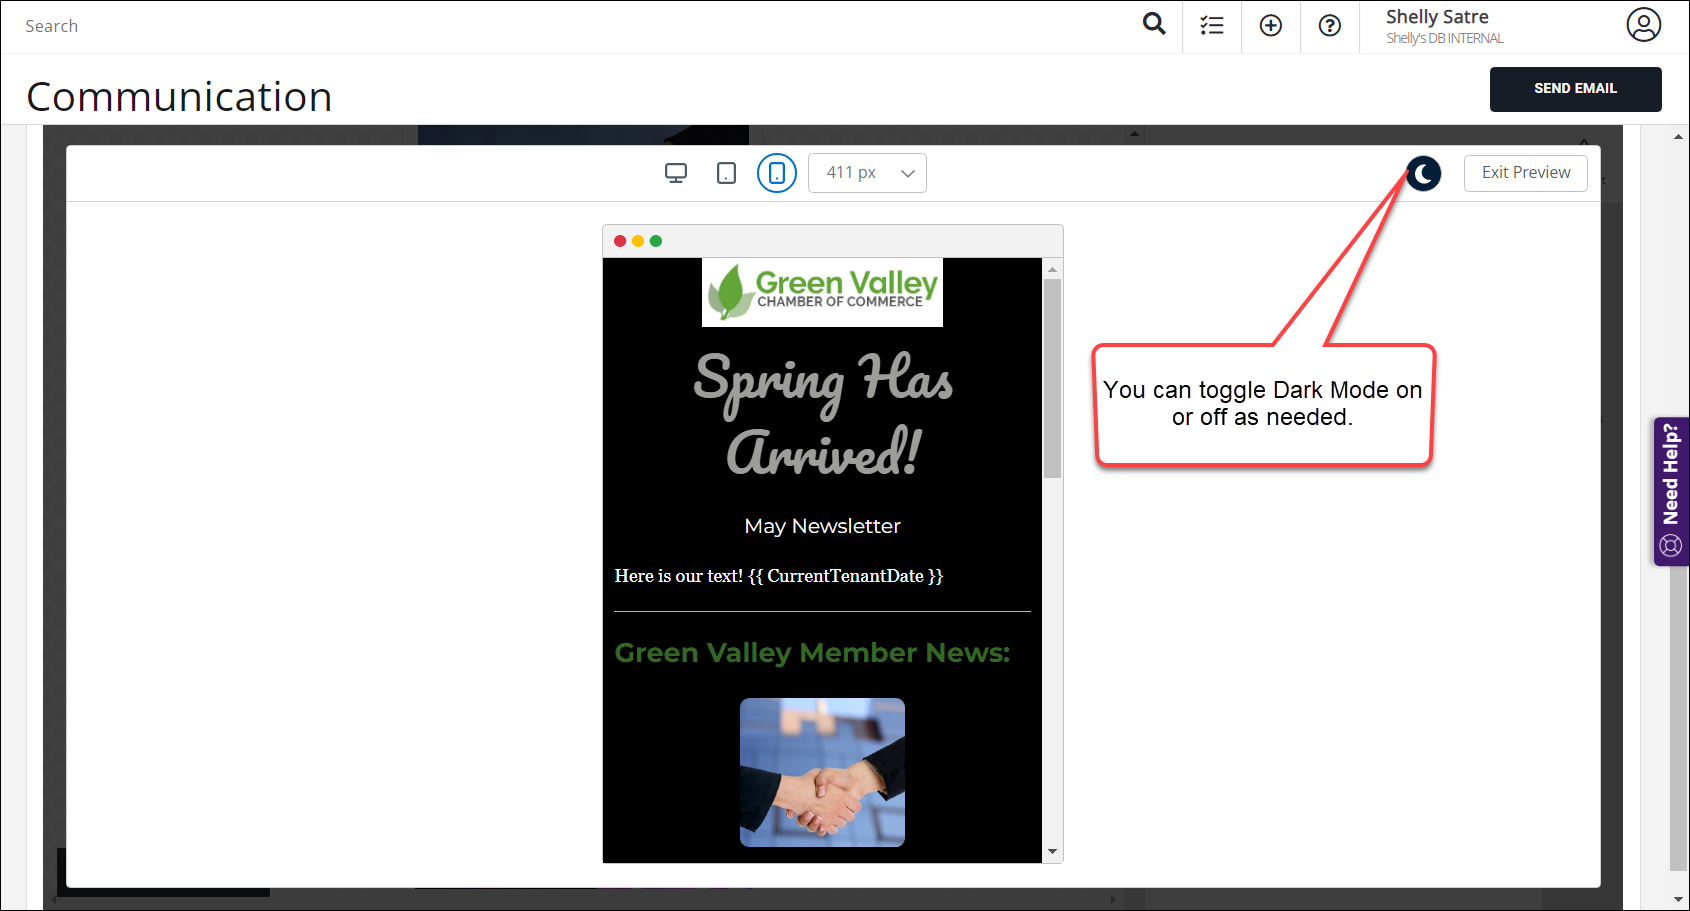
You can even see what your message will look like on a device set to use "Dark Mode"- just click the little sun icon. It will switch to a moon icon and display your newsletter in dark mode.

To exit the preview "browser frame", click the Exit Preview button in the upper right corner.
Email a Preview of your Email Designer Newsletter
- On the Email Designer tab, click the Actions button.
- Click Send Preview.

- This will open the Add Preview Email Designer window. Enter the recipient email address. You can enter more than one email as needed.

- Click Done and the system will send the preview of the newsletter via email to the entered recipients.
Sending
Send Your Email Designer Newsletter Immediately
- Enter the desired sender and recipient information to the To field. See Send a Mass Email for further instructions.
- Click the Send button in the upper right corner.

- This will open the Send Email window. Click OK to send the newsletter immediately.

Schedule Your Email Designer Newsletter to be Sent Later
- After completing your email design and entering your desired sender and recipient information, click the calendar icon (1) in the Delay Delivery Until field.

Scheduling a newsletter for later delivery - Select a date (2) and a time (3) for the email to be sent. This information will now appear in the Delay Delivery Until field.

Caption - When you have selected the date and time you wish the email to be delivered, scroll back to the top of the Email Designer; the Send button has turned into a Schedule button. Click the Schedule button and your email is now scheduled for later delivery. See View/Edit/Delete Scheduled Emails for more information.
|
|
CUSTOM TOOLS DATA IN DELAYED DELIVERY EMAILS: If using the custom tools (i.e. new members, upcoming events, etc.), the information that was populated upon creation of the email will be sent. The information will not reload when scheduled for sending at a later time. |
Forwarding an Email Designer message
There is a known issue with Email Designer communications where, when using the forwarding option in GrowthZone, the forwarded message displays double-spacing instead of the original spacing. At this time, the workaround is to save your Email Designer message as a template, then send the template out as opposed to forwarding a previously send Email Designer message.
Advanced/Related Topics
View Default Email Designer Templates


