.png)

 2848
2848
Voluntary fees may be added to your member invoices and membership applications. With a simple set up you can easily ask for, collect and track voluntary amounts. You may wish to use voluntary fees to ask for extra funds for special projects, such as technology improvements, or fundraising to support specific committee. A voluntary fee may be displayed on an invoice, and the member may choose to pay or not pay this fee.
Voluntary items are accounted for on a Cash basis; If the contact chooses not to pay the fee, it will not be counted against them in any past due invoices reports. Voluntary fees are designed so that it is clear to your members when and if they are opting into the additional fee.
- Click Setup in the Navigation panel.
- Click Fee Item in the Services, Products and Commerce section. A list of Fee Item currently configured in your system will be displayed.
- Click the New button.
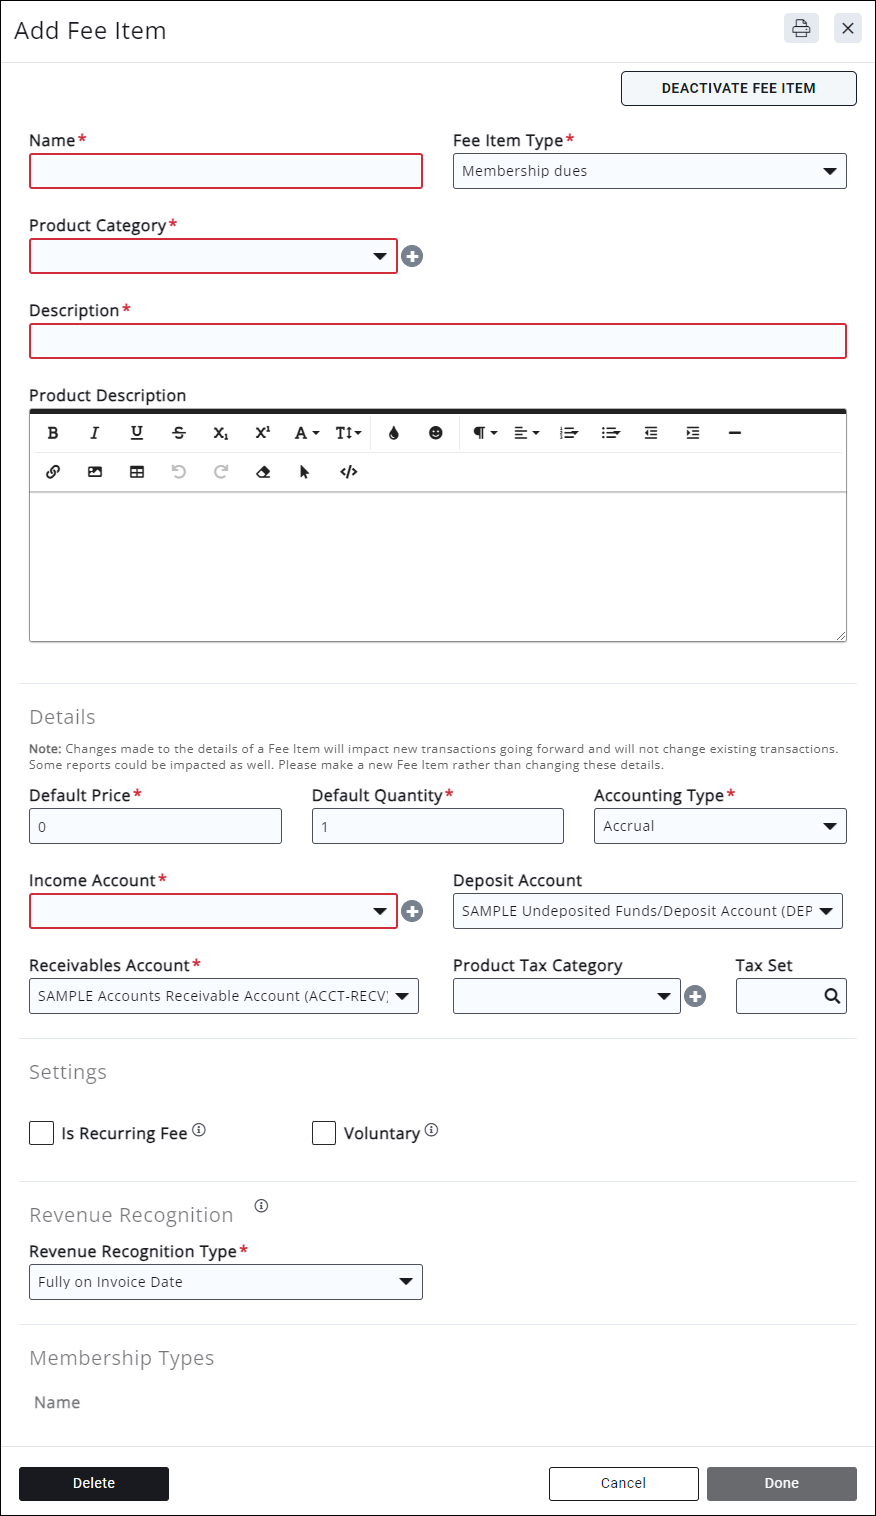
On the Add/Edit Fee Item screen, configure the following:
-
- Name: Provide a name for the Fee Item. This will be displayed when you are selecting fee items and is the name that you will report on in the software.
- Fee Item Type: Select the desired type. Only Membership Dues, Miscellaneous and PAC will allow for setting up a voluntary fee.
- Product Category: Select a product category from the drop-down list. Product Category is used for filtering and reporting. You can select a previously configured product category from the list, or, to add a new product category, click the + sign to create a new product category.
- Is Active: Select this check-box to activate this Fee Item. Only Active items may be billed and only active items will be displayed when you need to select a Fee Item.
- Description - Enter a description of the Fee Item. This description is what will display as the line item on invoices. In many cases, this can be changed or overwritten when the fee item is added to a membership, for an event registration fee, or most other uses.
- Product Description: Optional - you can provide further details about the product.
- Default Price: Optional - Enter a default price for this Fee Item. The default price will automatically be populated when adding the item to an invoice, however, this price may be over-ridden when you are assigning the good/service.
- Default Quantity: Optional - Enter the default quantity for this Fee Item. This would be used if a minimum purchase for this good/service is required, and automatically entered when adding the Fee Item to an invoice. This may be overridden when you are assigning the good/service.
- Accounting Type: Select Cash. This ensures that the voluntary fee is not recognized until it has been paid. Cash is the only accounting option possible for a voluntary fee.
- Income Account: Select the income account for this Fee Item. The drop-down list will be populated with the income accounts currently configured in your Chart of Accounts. You may add a new account by clicking the + sign. If you are unsure as to which account should be selected you will want to check with your accountant, as this will affect your financial statements.
- Deposit Account: Select the deposit account that should be used when a payment is received for this Fee Item. The drop-down list will be populated with the deposit accounts configured in your Chart of Accounts. IMPORTANT!! The deposit account selected here is for journal entry purposes. The physical bank account to which funds will be deposited is configured when setting up your gateway.
- Product Tax Category: If this Fee Item is taxable, select the appropriate product tax category. The drop-down list will be populated with tax categories currently configured in your system. If you wish to add a new product tax category, click the + button.
- Tax Set: If this Fee Item is taxable, select the appropriate tax set.
- Is Recurring Fee: If you wish to include this fee as a recurring fee item (for example tied to a membership) set as a recurring fee.
- Voluntary: Select the Voluntary check box.
- Require Confirmation: This option will display when the "Voluntary" option is selected. Enabling this will display a Confirmation Message text box, where you can configure the prompt that will appear to the end user if they choose to not pay the voluntary fee. This message can contain links and basic HTML.
Example:
- What it would look like if a member deselects the voluntary fee on a payment page:

This message will appear on the public payment page (as shown), on the membership application (v2 required), any Info Hub payment page, and whenever autopay is being set up via the Info Hub and "Only required membership items" is selected (requires the new My Billing tab).
- Membership Types: If the fee item is associated to any membership types in the future, the name(s) of the membership types will display here with a link to the membership type billing setup.
Click Done to save the new voluntary Fee Item.
Voluntary fees can be easily tracked by running the Voluntary Payment Report.

