 1728
1728
A member can remove Autopay via the Info Hub, but you can also remove it from the back office.
Steps to Remove Autopay
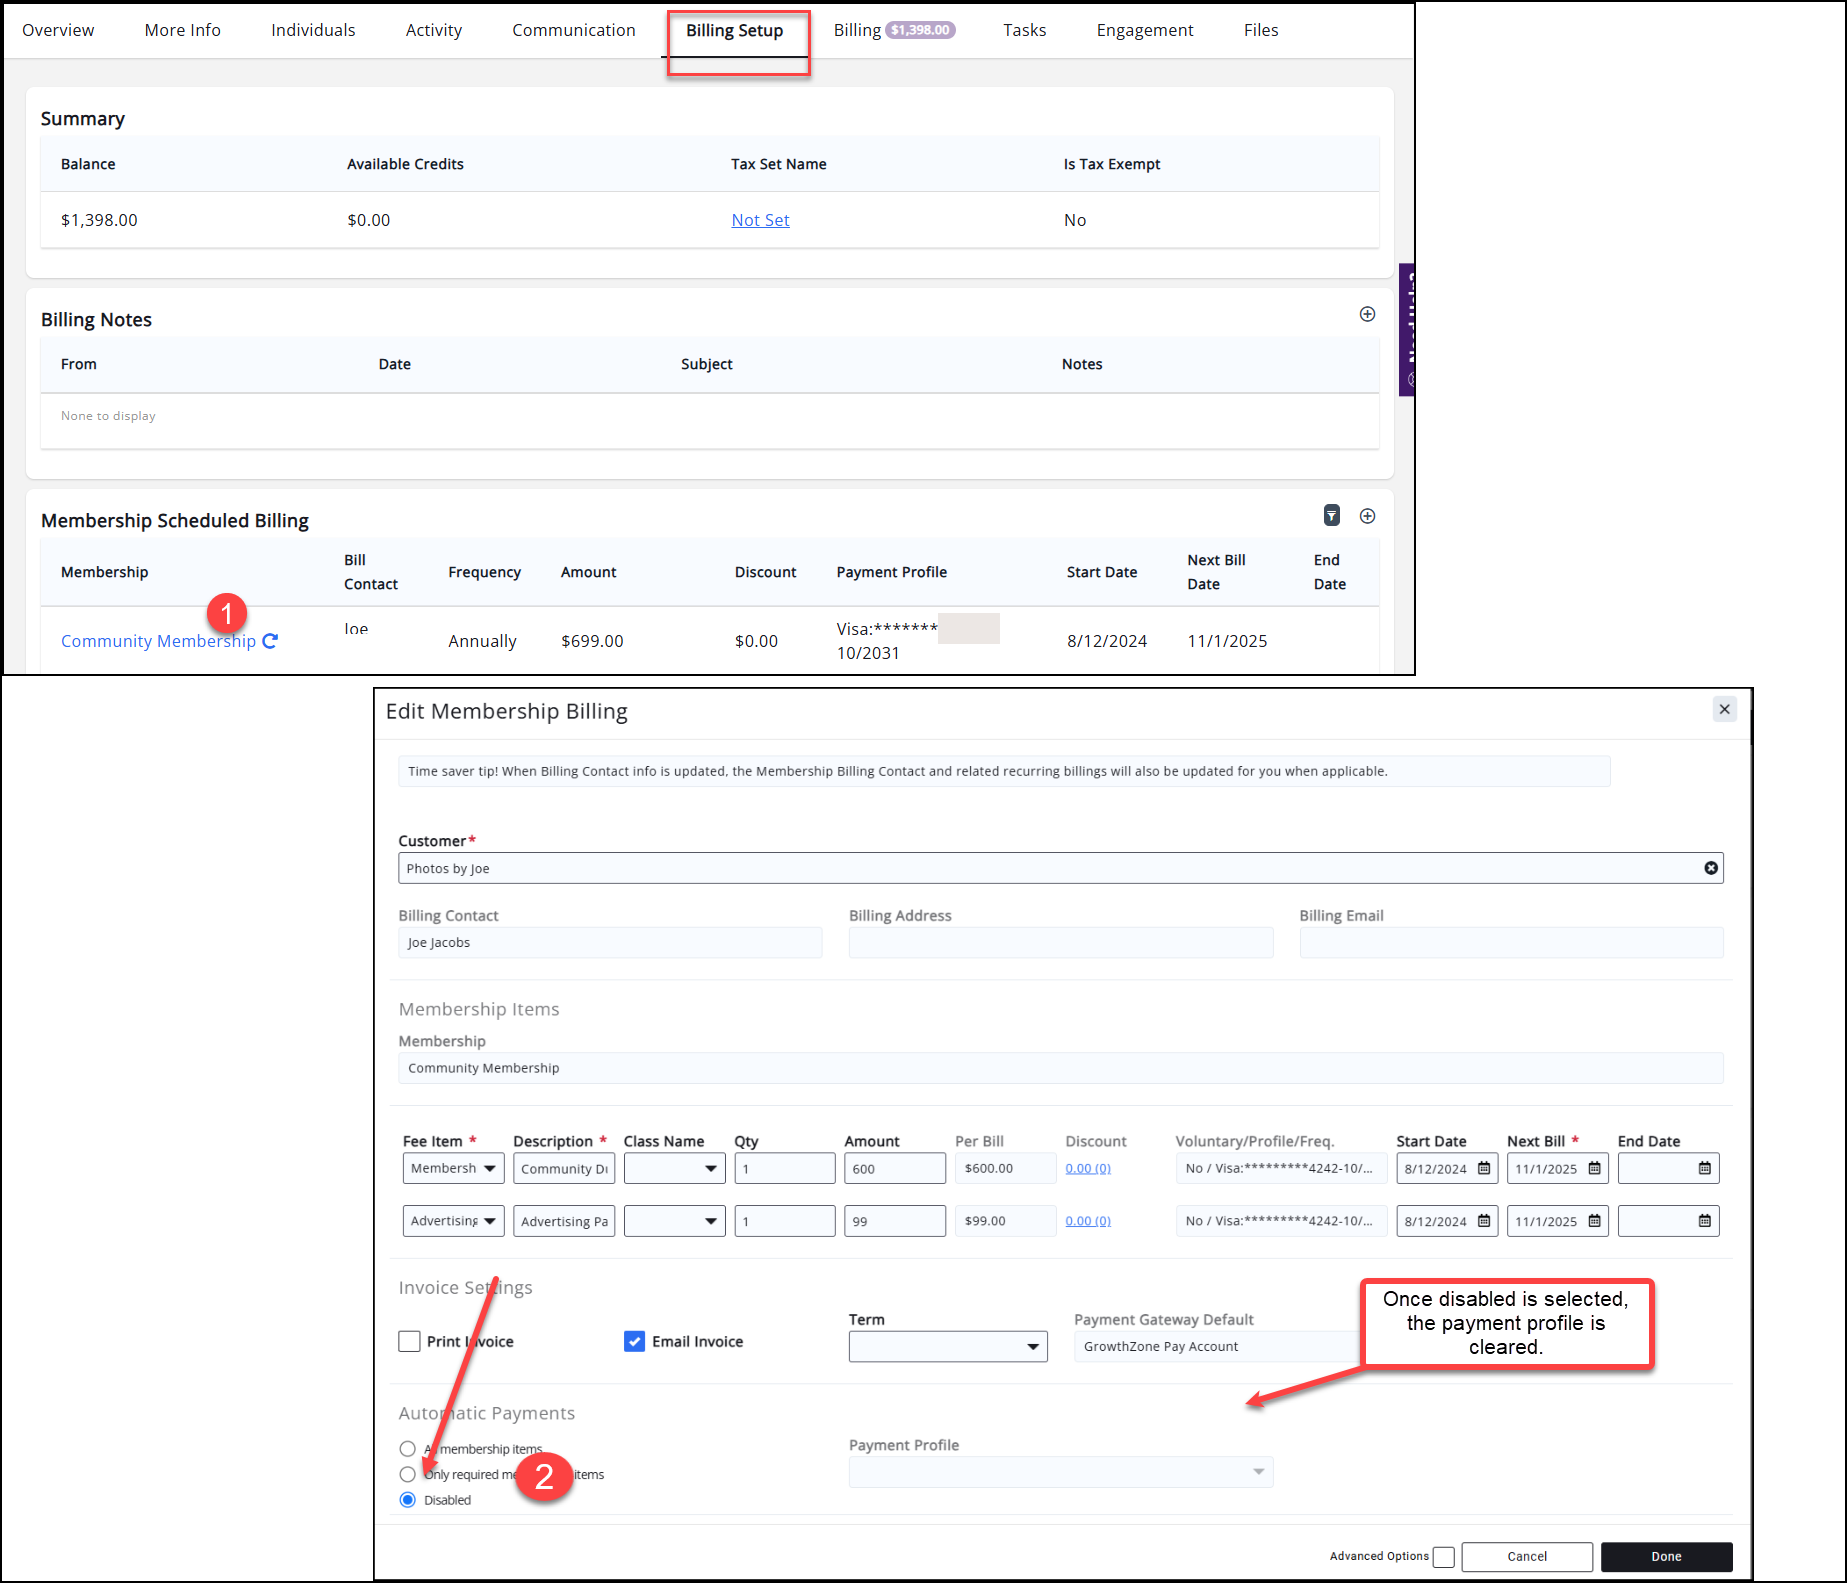
1. Go to the Billing Setup tab of a contact's membership. Scroll down to Membership Scheduled Billing. Click into the membership with the payment profile.
2. Choose Disable. This will remove the payment profile.
3. Click Done.

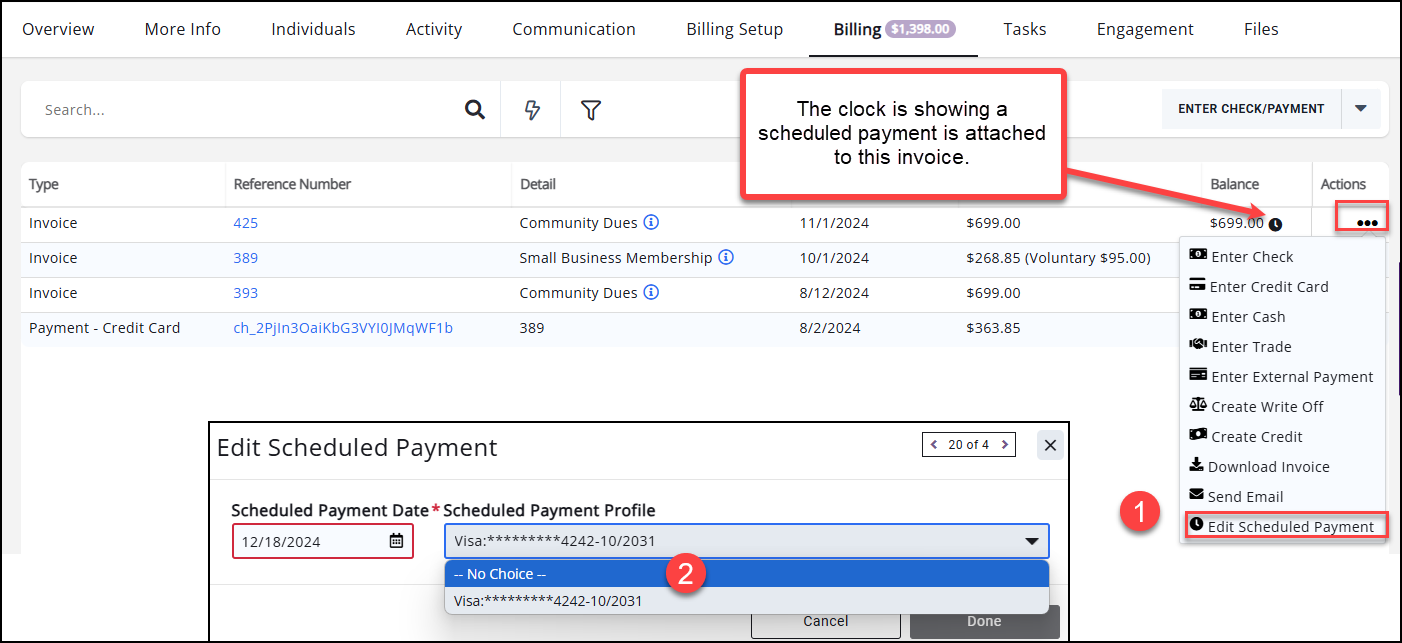
If the payment profile is attached to an open invoice (e.g. Upcoming billing for January was generated and the member received the invoice with showing the scheduled payment coming out of their card on 1/1), you would also need to cancel the scheduled payment if the customer requests.
Cancel a Scheduled Payment
1. Go to the contact's billing tab and the ellipses of the scheduled payment. Click on Edit Scheduled Payment.
2. Clear the scheduled payment.
3. Click Done.


